


Quick Start Guide
Smarter AI Dashcam

Components
1. Tamper-proof sensor
2. MicroSD card slot
3. SIM card slot
4. Reset button
5. Power port
6. Extension camera port
7. NFC sensor
8. Camera locking screw (x2)
9. Noise cancelling microphone
10. Driver accessible programmable emergency button
11. Cellular/Wi-Fi indicator
12. Cabin camera with Infrared illuminators
13. Speaker
14. Mounting kit
15. Road camera
16. Antenna
17. I/O cover
What’s Inside the Box

Smarter AI Dashcam

Smarter I/O Y Cable
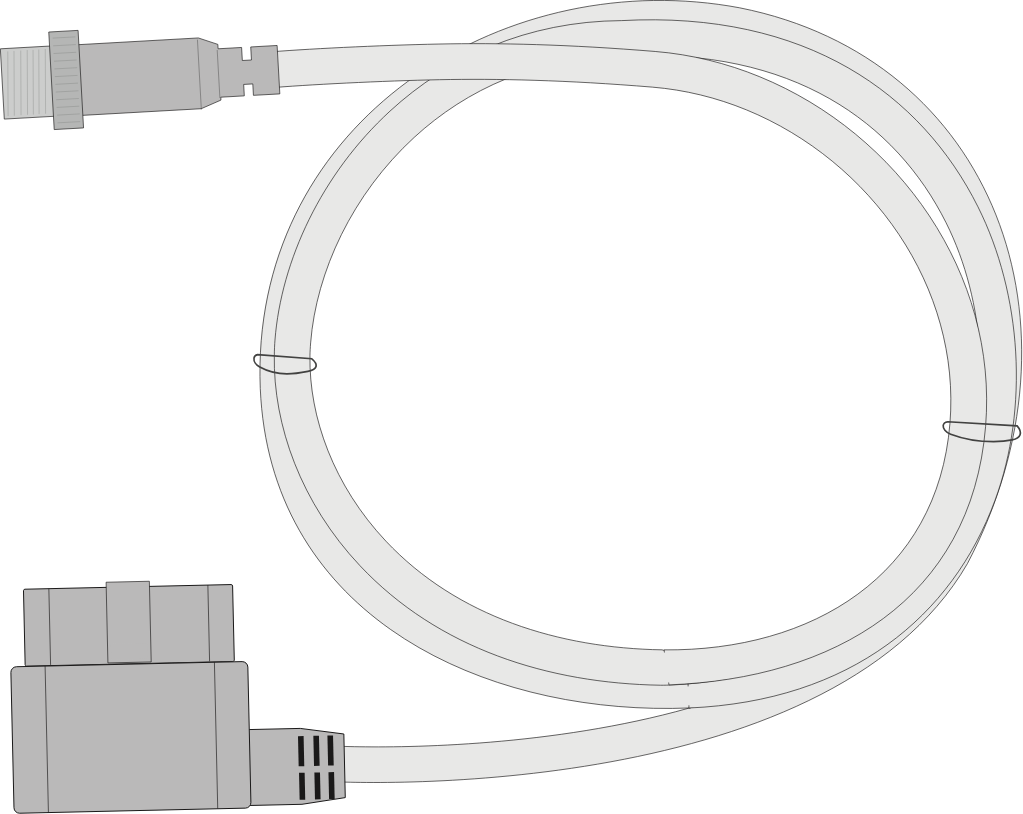
Smarter I/O OBD Cable

Smarter I/O Signal Cable

Hex Key

Mounting Kit

I/O Cover

Data Plan

Installation Guide
Setup Instructions

Registering a Smarter AI user account.
Register as an Installer
If you are installing a Smarter AI Dashcam for the very first time, ask your customer to create an installer account using your email address. Once created, you will receive a registration link via email from Smarter AI.
If this is not your first time with this customer, you do not need to register and can use your existing credentials.
Note: Even if you’ve installed Smarter AI dashcams before, if it’s a new customer, they still need to create an installer account for you. They should use the same email address already registered with other customers, which you can login with.
Register as a Fleet Admin
If you are a new fleet admin, you would have received an email from Smarter AI to set up your account. Please follow the instructions in the email to register your Fleet Admin account.
If you are an existing fleet admin, you do not need to register again and can use your existing credentials.

Connecting your Smarter AI Dashcam to the vehicle.

Connect the single end of the Smarter AI I/O Y cable to your Smarter AI Dashcam.

Connect the double ends of the Y cable to the I/O OBD cable and I/O Signal cable respectively.

Connect the OBD plug from the OBD cable to the OBD port of your vehicle.

Connect the wires from the signal cable into your fuse box. Connecting the ACC and GND wires is mandatory.
Smarter I/O OBD Cable
Smarter I/O Y Cable
Smarter I/O Signal Cable

Bus / Protocol / Purpose
CAN
J1939
Power
OBD-II Connector PINs
6
6
4
14
14
16
Wire
ACC
GND
Reverse
Speed Plus
Inputs
Output
RS232 TX OUT
RS232 RX IN
Connect to
Accessory/Ignition
Ground
Not in use / Do not connect
Digital Inputs (5V)
Digital Output (3.3V)
RS232 TX Out (To vehicle)
RS232 RX In (From vehicle)
Color
Red
Black
Orange
Blue
Yellow
Purple
Brown
Gray
Green
White
Connection
Mandatory
Optional

Installing the Smarter AI Mobile App
Download and install the Smarter AI mobile app via the Android Play Store or the Apple App Store.


Logging in to your Smarter AI Mobile App
Login to the Smarter AI app with the credentials you set up in STEP 1.


Activating the camera
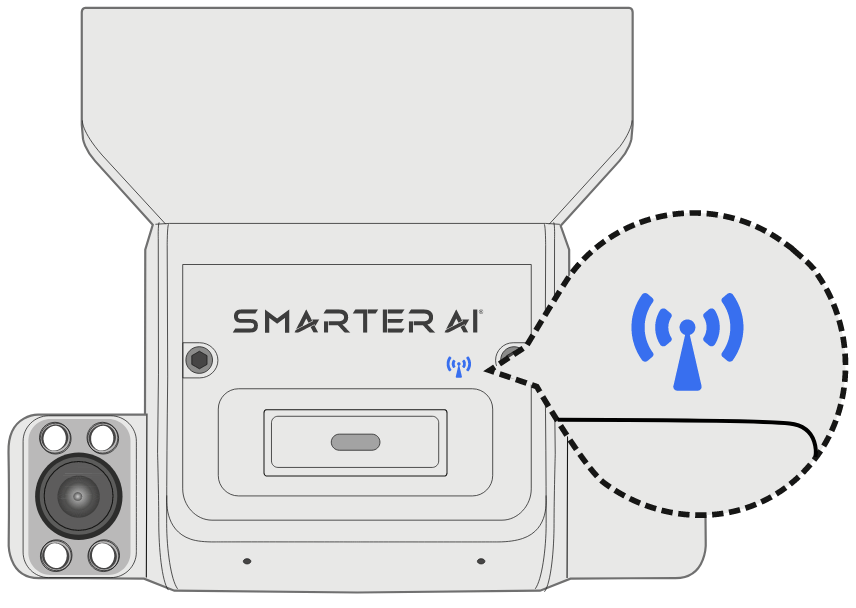
The Dashcam is ready to be onboarded when the Cellular/Wi-Fi indicator blinks blue. If the indicator is solid green, skip to section 6.

Open the Smarter AI mobile app and tap the “+” icon to add your new camera.

Tap your camera serial number to connect. You can also press the camera’s physical button to highlight it in the app or tap the bell icon to make it chime. Once activated, the app will redirect you to the main cameras tab.

Camera Adjustment

Attach the camera mount to the camera by aligning the 3 mounting holes’ position on the back of the camera against the mounting slots on the mount. Slide the camera to the left to lock it in place.

Loosen the camera locking screws with the provided hex key. Once loosened, the camera imagers can be swiveled up or down in small 'clicks'.
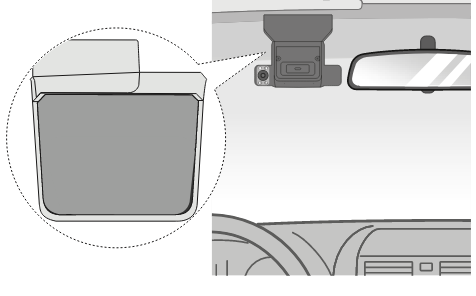
Hold the camera on the windshield without taking off the adhesive strip. The camera position should be within the area where you want to do the final mounting.

In the Cameras tab of your mobile app, tap the 'wrench' icon on the bottom right of the camera thumbnail. This will open the adjustment mode for the camera.

Once inside the adjustment mode. Tap the roadside imager to open its live view. Follow the onscreen instructions to adjust the roadside imager. You can swivel the imager up or down or move the entire camera to get the right view.

Once your roadside adjustment is done. Tap on the cabin imager to open its live view. Follow the onscreen instructions to adjust the cabin imager. You can swivel the imager up or down or move the entire camera to get the right view.

Once you have completed the adjustment, mark the camera position with a tape or any other tool.
Tighten both camera locking screws with the provided hex key.

Remove the adhesive cover from the camera mount and attach the camera to the previously marked position.

Install the I/O cover on top of the camera and tighten the screw with the hex key.

Hide any visible wiring by the placing the wire under the roof liner and behind the driver side A Pillar.

Web Dashboard

Login to your Smarter AI Dashboard to manage and operate your Dashcam.