


Quick Start Guide: Dashcam Pro + Extension Camera
Smarter AI Dashcam Pro


Components
1. Driver-accessible programmable emergency button with LED
2. Cabin camera with Infrared
illuminators
3. Reset button (not in use)
4. Mounting slot (x4)
5. SIM card slot
6. Power port
7. Weatherproof Extension camera port
8. Extension camera port
9. Road camera
10. MicroSD card slots
11. NFC sensor
12. Noise cancelling microphone
13. Speaker
14. Cabin camera locking screw
15. Cellular/Wi-Fi indicator
15. Road camera
16. Mounting kit
17. I/O cover
18. Truck cable cap (optional)
19. Daschcam locking screw
What’s Inside the Box

Smarter AI Dashcam Pro
Vehicle Cable

Hex Key

I/O Cover

Mounting Kit

Data Plan

Installation Guide
Additional Accessories

Extension Camera

Dashcam Cable Quad

Y Cable

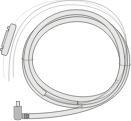
Extension Cable 5m / 10m

TVI Monitor
Before You Begin
Gather All Components: Ensure you have the Dashcam Pro, the extension camera, the 5m or 10m extension cable (whichever length you need), the Y cable, the Dashcam Cable Quad, the TVI monitor, and the power cables (including the fuse box connectors).
Power Off: For safety, make sure your vehicle’s ignition is off and there is no power going to the fuse box before you start connecting any cables.

Step-by-Step Installation


Connect the Extension Camera to the Extension Cable
Locate the cable attached to the extension camera.
Plug it into the male end of the 5m or 10m extension cable (choose the length that fits your vehicle).
Attach the Extension Cable to the Y Cable
Take the female end of the extension cable you just connected to the camera.
Plug it into the single side of the extension Y cable labeled “Camera.”

Connect the Y Cable to the TVI Monitor
Find the side of the Y Cable labeled “Monitor.”
Plug it into the TVI monitor’s input cable labeled “Cam 1.”

Connect the Y Cable to the Dashcam Cable Quad
Locate the side of the Y Cable labeled “CDR.”
Plug it into the Dashcam Cable Quad input labeled “Cam 1.”

Attach the Dashcam Cable Quad to the Dashcam Pro
On the Dashcam Cable Quad, you’ll notice multiple connectors. One of these connects to the power and data port on the Dashcam Pro.
Plug it in securely to the Dashcam Pro.

Connect the Dashcam Cable Quad to the Power Cable
The Dashcam Cable Quad has a fifth cable with a female connector.
Attach this to the male end of the power cable.

Power Connections to the Fuse Box
The power cable you just connected has three wires on the other end.
Plug these three wires into the fuse box, following the vehicle’s fuse box instructions.
Repeat the same for the TVI Monitor’s three-wire power cable. Both the dashcam and the monitor should be connected to the fuse box for power.
Wire
ACC
B+
GND
Connect to
Accessory/Ignition
Power (12-24VDC)
Ground
Color
Red
Yellow
Black
Connection
Mandatory

Installing the Smarter AI Mobile App
Download and install the Smarter AI mobile app via the Android Play Store or the Apple App Store.


Logging in to your Smarter AI Mobile App
Tap ‘I’m an installer’ on the Smarter AI mobile app to sign up or sign in. You do not need to have an existing account and can use an unregistered email address to login.


Activating and Adjusting the Smarter AI Dashcam Pro

Once logged in to the Smarter AI mobile app, tap ‘Activate Dashcam’. Ensure the status LED on the dashcam is solid green and do not remove the adhesive strip on the mounting bracket. Go through the instructions and then tap next to scan the barcode.

Scan the barcode for the S/N of the dashcam and then tap next, you can also input the barcode manually.
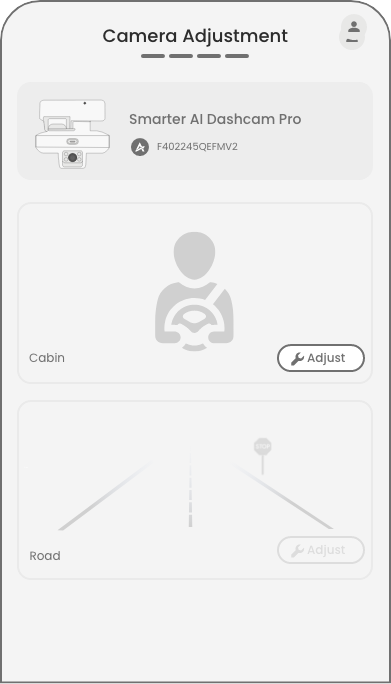
Once the dashcam has been activated, tap ‘Adjust’ on the cabin camera thumbnail to adjust and mount the cabin camera. Follow the instructions in the bottom tiles and tap ‘Done’ when completed.

Move onto adjusting the road camera by tapping ‘Adjust’ on the road camera thumbnail. Follow the instructions in the bottom tiles and tap ‘Done’ when completed.
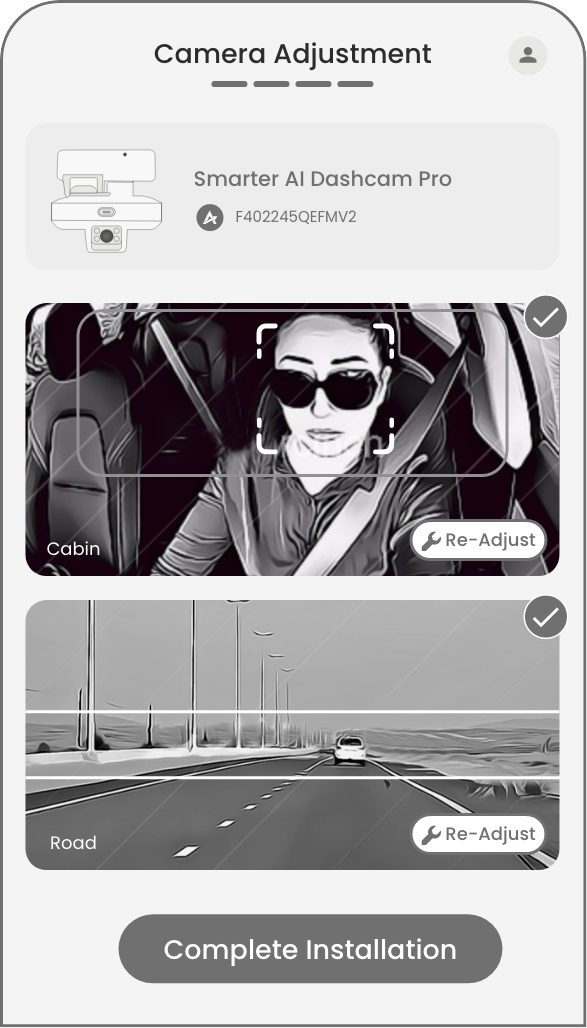
Once you’ve adjusted the road and cabin cameras, you can tap ‘Complete Installation’ to mark a successful install of the dashcam.

Install the I/O cover on top of the camera and tighten the screw with the hex key.

Hide any visible wiring by the placing the wire under the roof liner and behind the driver side A Pillar.

Web Dashboard

Manage and Operate your Dashcams from your Smarter AI Dashboard.