


Quick Start Guide
1. Overview of Smarter AI Dashcam G

2. Inside the Box

Smarter AI Dashcam G
3. Mobile App
4. Geotab GO® IOX Interface
The Smarter AI Mobile App provides access to cameras and notifications. The Smarter AI Dashboard is a full-featured camera, user, and driver management interface.
Please connect to your MyGeotab (R) account to access your Dashcam.
4.1 Vehicle Cable Kit
Wire
ACC

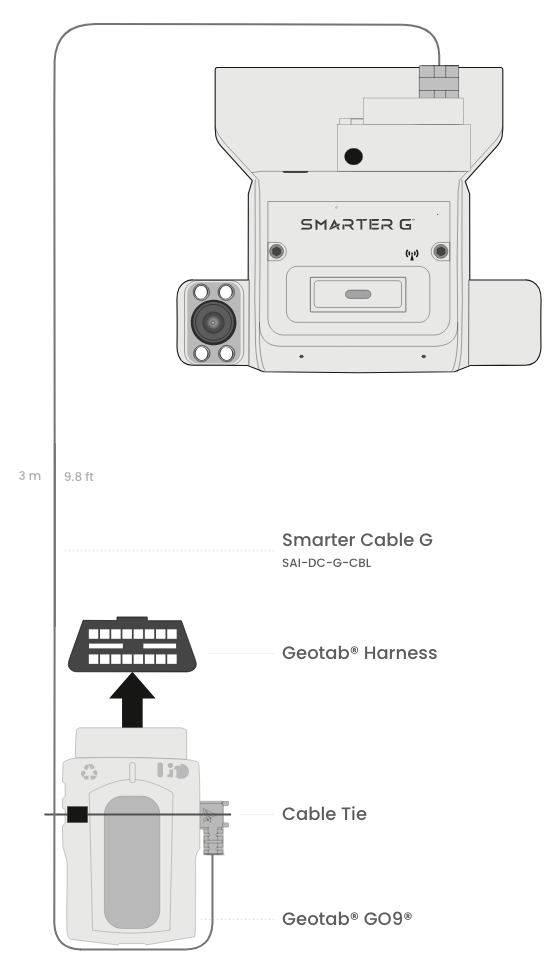
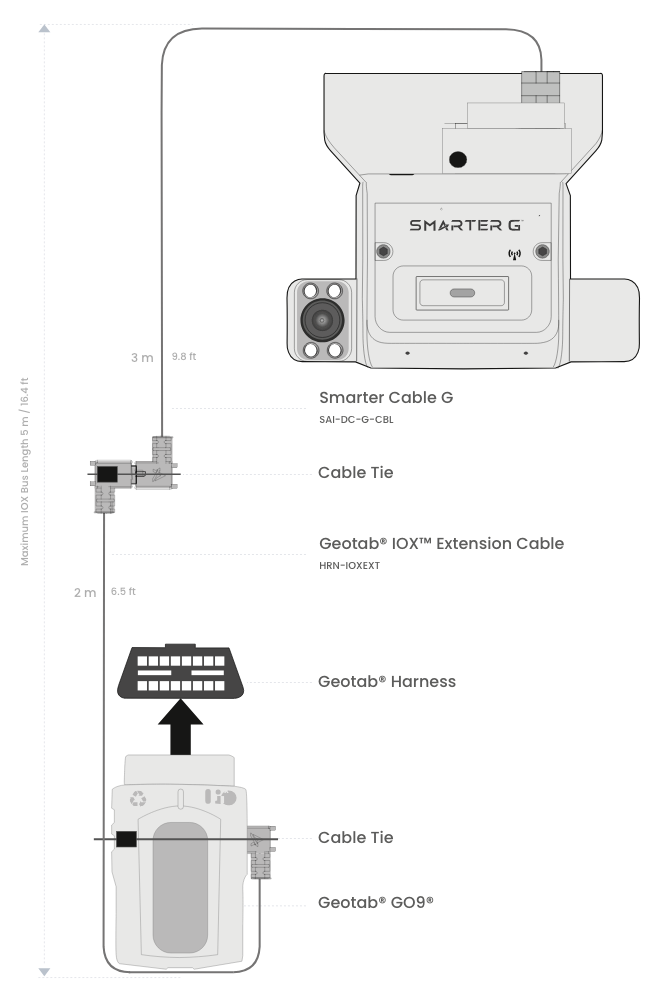
Smarter Cable G
Install the Smarter AI Mobile App.


Hex Key
Geotab® GO9® - Direct Connection
With optional 2m / 6.5 ft extension cables:
- HRN-IOXEXT
- HRN-IOXEXT-A
IOX bus maximum length: 5 m / 16.4 ft.

Mounting Kit

Data Plan
I/O Cover

Installation Guide

2.
Login or Register with a Google, Microsoft, Geotab, or Smarter AI account.
Follow the Smarter AI Mobile App instructions to install the Smarter AI Dashcam.

Geotab® GO9® - IOX Add-Ons
IOX bus maximum length: 5 m / 16.4 ft.
IOX max current draw: 2.5 A
Geotab® GO9® RUGGED
Adapter cable needed: HRN-RX06S4
No IOX Add-Ons
4.2 ECU Cable Kit
1
GND
Black
Ground
REVERSE
Orange
Reverse
Mandatory
5. Dashcam Installation
SPEED PULSE
Blue
Speed Pulse
Dead Reckoning
INPUT
Yellow
Digital Input (5V)
Optional


Purple
Brown
OUTPUT
Gray
Digital Output (3.3V)
RS232 TX OUT
Gray
RS232 TX Out (to vehicle)
RS232 RX IN
White
5.1 Positioning & Attachment
Connect to
Accessory/Ignition
RS232 RX In (from vehicle)
Place the Smarter AI Dashcam near the rearview mirror. Ideally, the Smarter AI Dashcam should be as close as possible to the vehicle center and as in front of the driver’s face as possible.
2

Make sure that the driver’s field of view is not obstructed and that both cameras’ field of view is not blocked before fixing the camera, using the Smarter AI Mobile App.
3

Clean the installation area with the provided alcohol wipe. Attach the mounting kit to the windshield. Mount the Dashcam.

Connect the Smarter Cable G to the Geotab® GO® (see above) and the Dashcam.
5.2 Cameras Alignment

Components
Tamper-proof sensor
MicroSD card slot
SIM card slot
Reset button (not in use)
Power port
Extension camera port
NFC sensor
Camera locking screw (x2)
Noise cancelling microphone
Driver accessible programmable emergency button
Cellular/Wi-Fi indicator
Cabin camera with Infrared illuminators
Mounting kit
Speaker
Road camera
Antenna
I/O cover
Truck cable cap (optional)


Connection
Mandatory


Color
Red

Wire
ACC
B+
Black
Power (12-24VDC)
GND
Ground
Connect to
Accessory/Ignition
Connection
Mandatory

Color
Red
Yellow
1
Loosen both camera locking screws with the hex key.
2

Adjust the road camera to divide its view equally above and below the horizon.
3
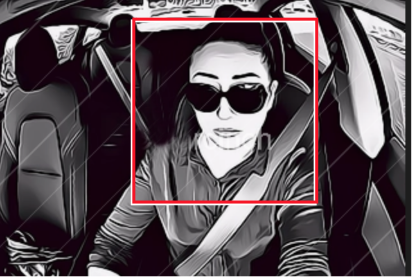
Adjust the cabin camera to view the driver’s head and vehicle cabin.
6. Web Dashboard
4

Tighten both camera locking screws with the hex key.

1

Please connect to your MyGeotab (R) account to access your Dashcam.
2

Manage and Operate your Dashcams.
7. Quick Specifications
Power & Interfaces
Operating Voltage
ACC/Ignition Voltage
Power Consumption
Parking Mode Power Consumption
4
12 - 32 VDC
9 - 32 VDC
Max 6W (12V/500mA)
50mW (12V/4.2mA)
5
Install the I/O Cover and tighten the screw with the hex key.
6
The Dashcam is ready to be onboarded when the Cellular/Wi-Fi indicator blinks blue.
7
Open the Smarter AI mobile app and tap the “+” icon to add your new camera.
Follow the onscreen instructions to install the Dashcam.
8
